Appearance
Quarter Custom Field Type for Jira Cloud
Plan your work using calendar quarters when specific dates cannot be committed to.
Introduction
Use this custom field in Jira to plan your work using Calendar quarters. This is particularly useful when you cannot commit to an actual date, but you know roughly when work will be completed - for example "sometime in Q3" or "by end of Q4". This quarter field allows you to select a quarter and year combination.
The Quarters Field Type is particularly useful in Agile environments where you need to plan work at a higher level without committing to specific dates.
Getting Started
Installation
Log into your Jira instance as a Jira Administrator.
Click the Apps dropdown and choose Find new apps.
- The Find new apps screen loads.
Search for Quarter Field Type and click on the app tile.
- The App Details screen loads.
Click Get app to start installing your app.
You're all set! Click Close in the Installed and ready to go dialog.
You can also install the app from the Atlassian Marketplace.
Configuration
Migration from Previous Versions
In previous versions of the app we used the custom field context to configure the year range that is associated with the instance of the custom field. However, we have now changed this so that the app has its own configuration screen.
Login as a Jira Administrator and Select Admin ⚙ > Apps.
Select Quarter Field Configuration in the Apps navigation menu on the left hand side of the screen.
The existing custom fields (if any) will be displayed.
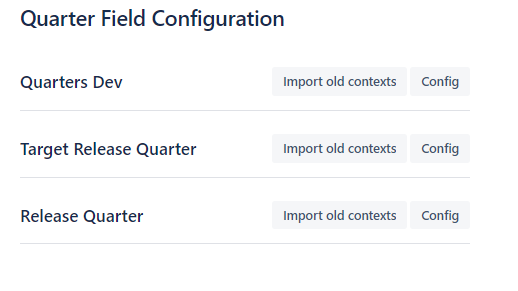
If you have used a previous version of the app, and have created some Quarters fields, then you can use the "Import old contexts" button to import the settings for those fields.
Create a Quarter Custom Field
We start by creating the custom field in the normal way and choose the Quarters Field type.
Login as a Jira Administrator and Select Admin ⚙ > Issues.
Under FIELDS, select Custom fields.
Click Create custom field. Make sure to select All to view the available field options.
Scroll down the list and select the Quarters Field Type and click Next.
Type the Name and Description of the field.
- The name you select appears as the custom field's title wherever the field appears.
Click Create.
Configure the Quarter Field in the App Configuration Page
Once you have created the custom field, you need to configure it in the Quarter Field app configuration page.
Login as a Jira Administrator and Select Admin ⚙ > Apps.
Select Quarter Field Configuration in the Apps navigation menu on the left hand side of the screen.
The existing custom fields will be displayed.
Click the Edit button next to the custom field you wish to configure.
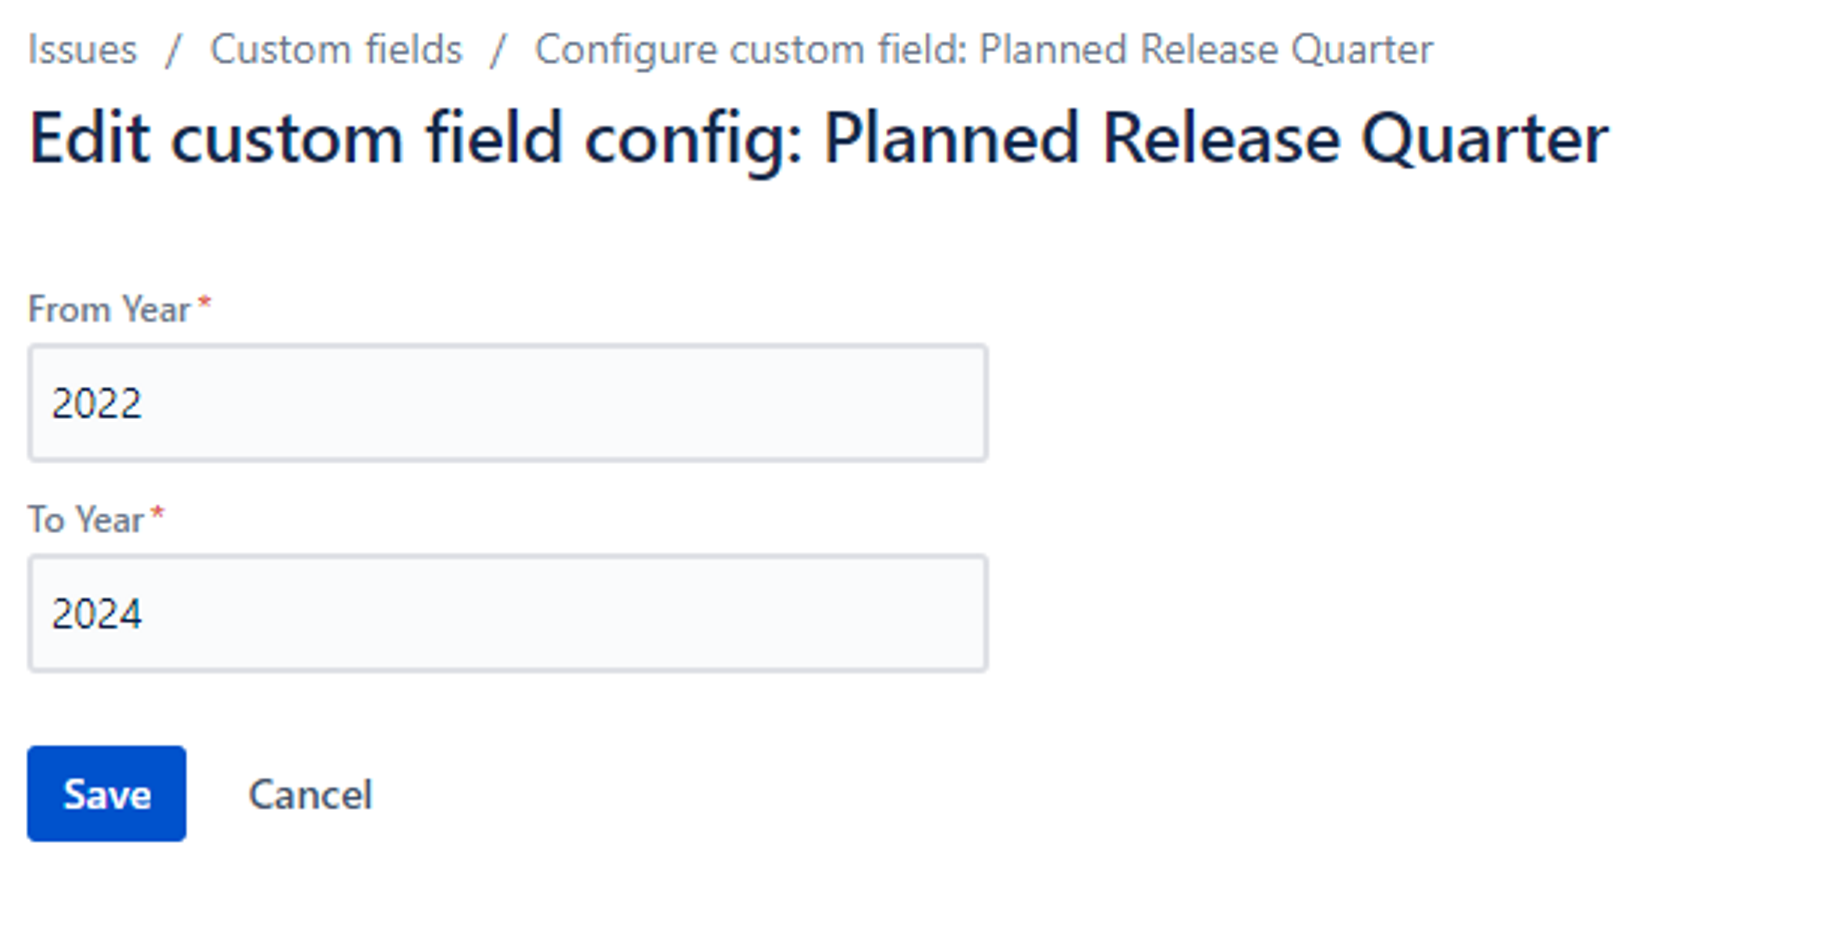
Set the Start Year and End Year for the quarter field. This determines the range of years that will be available for selection.
Click Save.
Grant Access to the App
The first time you use the app, you need to grant access to it.
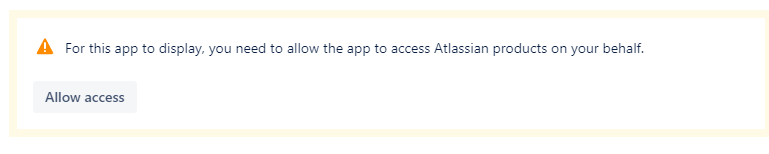
Click Allow access. On the next screen you will be presented with a list of permissions. Please review these and if you have any questions please contact us. The app only requires read access to data and does not make any updates.
How to Use
First Use - Grant Access
The first time you use the app, you need to grant access to the app. You will be presented with a permission dialog.
Click Allow access. On the next screen you will be presented with a list of permissions. Please review these and if you have any questions please contact us. The app only requires read access to data and does not make any updates.
Using the Quarter Field in an Issue
To use the Quarter field in an issue:
Navigate to an issue that has the Quarter custom field.
Click on the Quarter field to display the quarter picker.
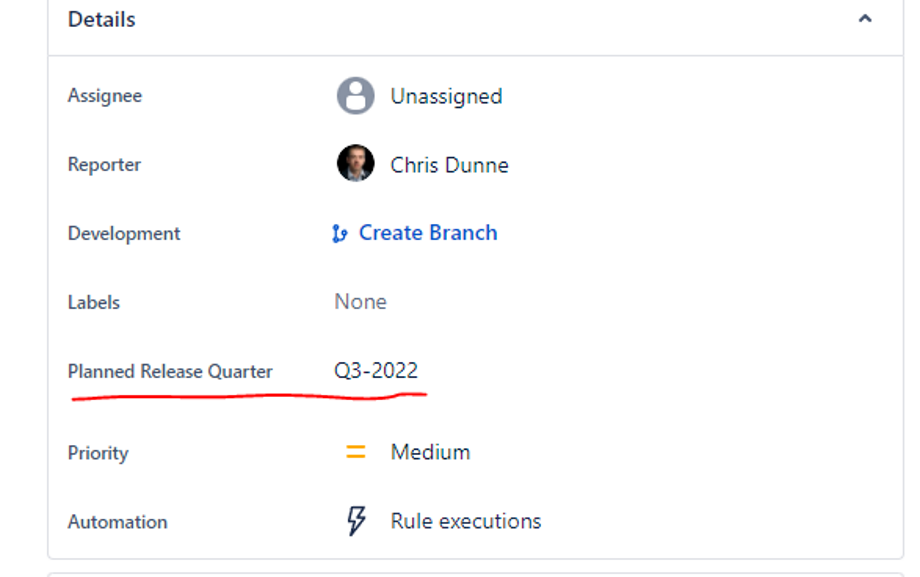
Select the desired quarter and year from the dropdown.
The field will update with your selection.
Editing the Quarter Field
When editing the Quarter field, you can select from the predefined quarters:
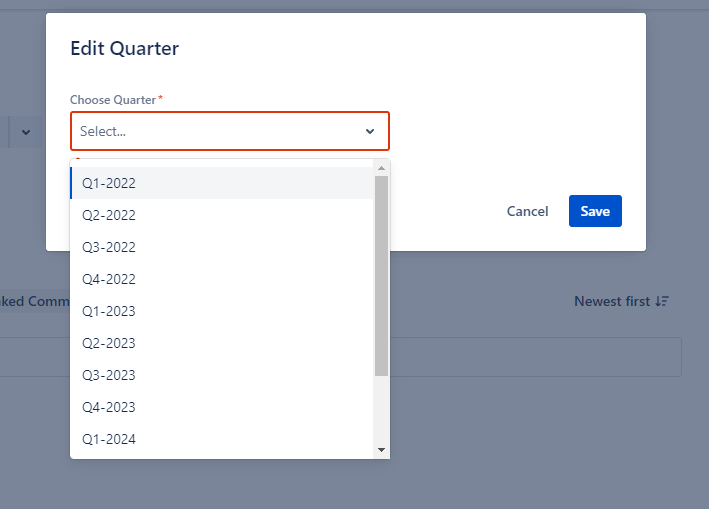
The available options are:
- Q1 (January - March)
- Q2 (April - June)
- Q3 (July - September)
- Q4 (October - December)
Using Quarters in JQL
You can use the Quarter field in JQL (Jira Query Language) searches to filter issues based on their quarter values.

Example queries:
customfield_xxxxx = "2024-Q1"- Find all issues in Q1 2024customfield_xxxxx = "2024-Q3"- Find all issues in Q3 2024
Advanced JQL with Date Functions
The Quarter field also supports advanced JQL queries with date functions:
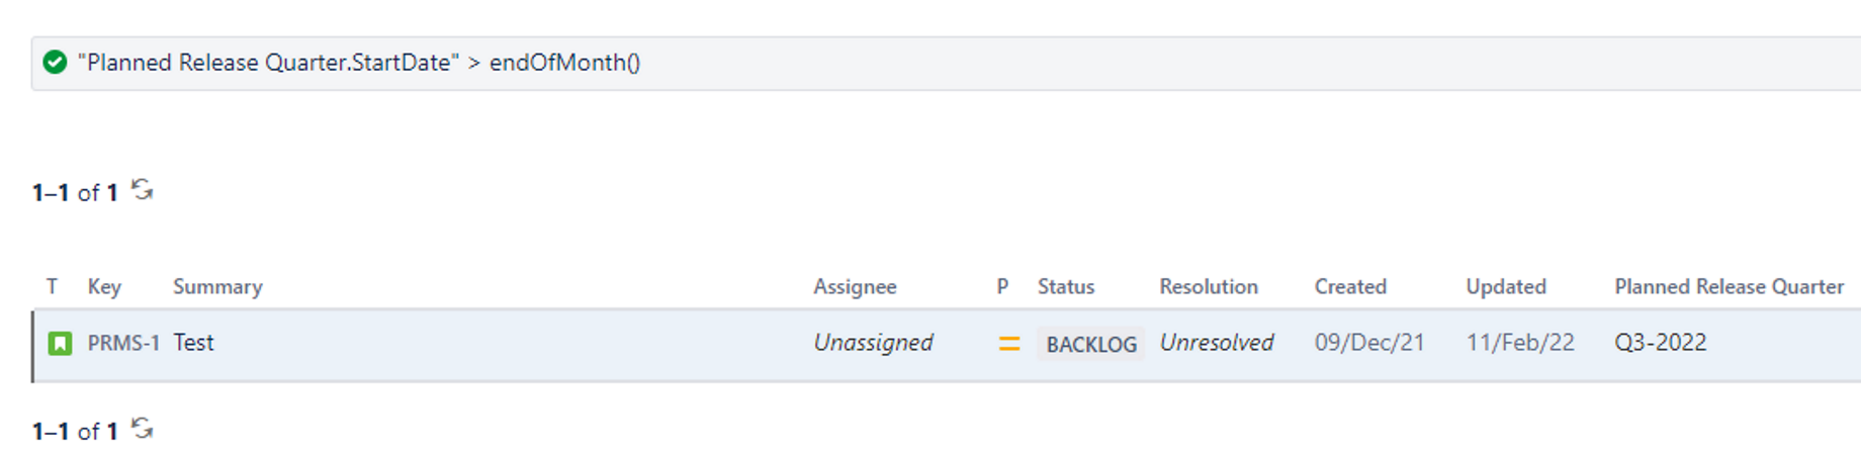
You can use date functions to query quarters relative to the current date or to create dynamic queries that automatically adjust based on time.
Privacy & Security
The Quarter Field Type app follows Jira Cloud's security and privacy standards. The app does not store any personal data. All quarter information is stored within your Jira instance as custom field values.
The app requires read access to issue data to display the quarter field in your issues and to support JQL queries. The app does not make any modifications to your data.
For more information on Jira Cloud security, please visit the Atlassian Trust Center.