Appearance

Component Sync for Jira - User Manual
Table of Contents
- Overview
- Key Features
- Prerequisites
- Installation
- Getting Started
- Managing Master Components
- Selecting Spaces
- Synchronizing Components
- Troubleshooting
- Best Practices
- FAQ
- Known Limitations
Overview
Component Sync for Jira is a Jira Cloud administration tool that helps standardize component management across multiple spaces. The app allows administrators to maintain a master list of components and synchronize them to selected Jira spaces automatically or on-demand.
Target Audience: Jira administrators managing multiple spaces who need consistent component definitions across their Jira instance.
Key Benefit: Eliminates the need to manually create and maintain identical components across multiple spaces, reducing administrative overhead and ensuring consistency.
Key Features
- Master Component Management - Create and maintain a centralized list of components with names, descriptions, and assignee types
- Space Selection - Choose which spaces receive synchronized components through an easy-to-use interface
- Auto-Sync - Automatically add new master components to selected spaces when they are created
- Manual Sync - Trigger on-demand synchronization to update all selected spaces at once
- Error Tracking - View detailed error logs when synchronization issues occur
- Bulk Operations - Select or deselect all spaces with a single toggle
Prerequisites
Before using Component Sync for Jira, ensure you have:
- Jira or Site Administrator privileges. This is required to install, setup, configure and use the app.
- At least one Jira space (for testing synchronization)
Installation
Step 1: Install the App
Log into your Jira instance as a Jira Administrator.
Click the Apps dropdown and choose Explore more apps.
- The Explore more apps for Jira screen loads.
Search for Component Sync for Jira and click on the app tile.
- The App Details screen loads.
Click Try it free to start installing your app.
In the Select a Site screen, your Jira site should already be selected. Click Review.
Review the information on the next screen, and click Start free trial.
A notification will appear when the app has been installed.
You can also install the app from the Atlassian Marketplace.
Step 2: Access the Component Sync Global Admin Page
- Navigate to Settings (gear icon) > Apps
- Right click the "..." menu next to Apps and select Manage Apps
- In the sidebar, look for Component Sync for Jira under the Apps section
- Click to open the administration interface
Getting Started
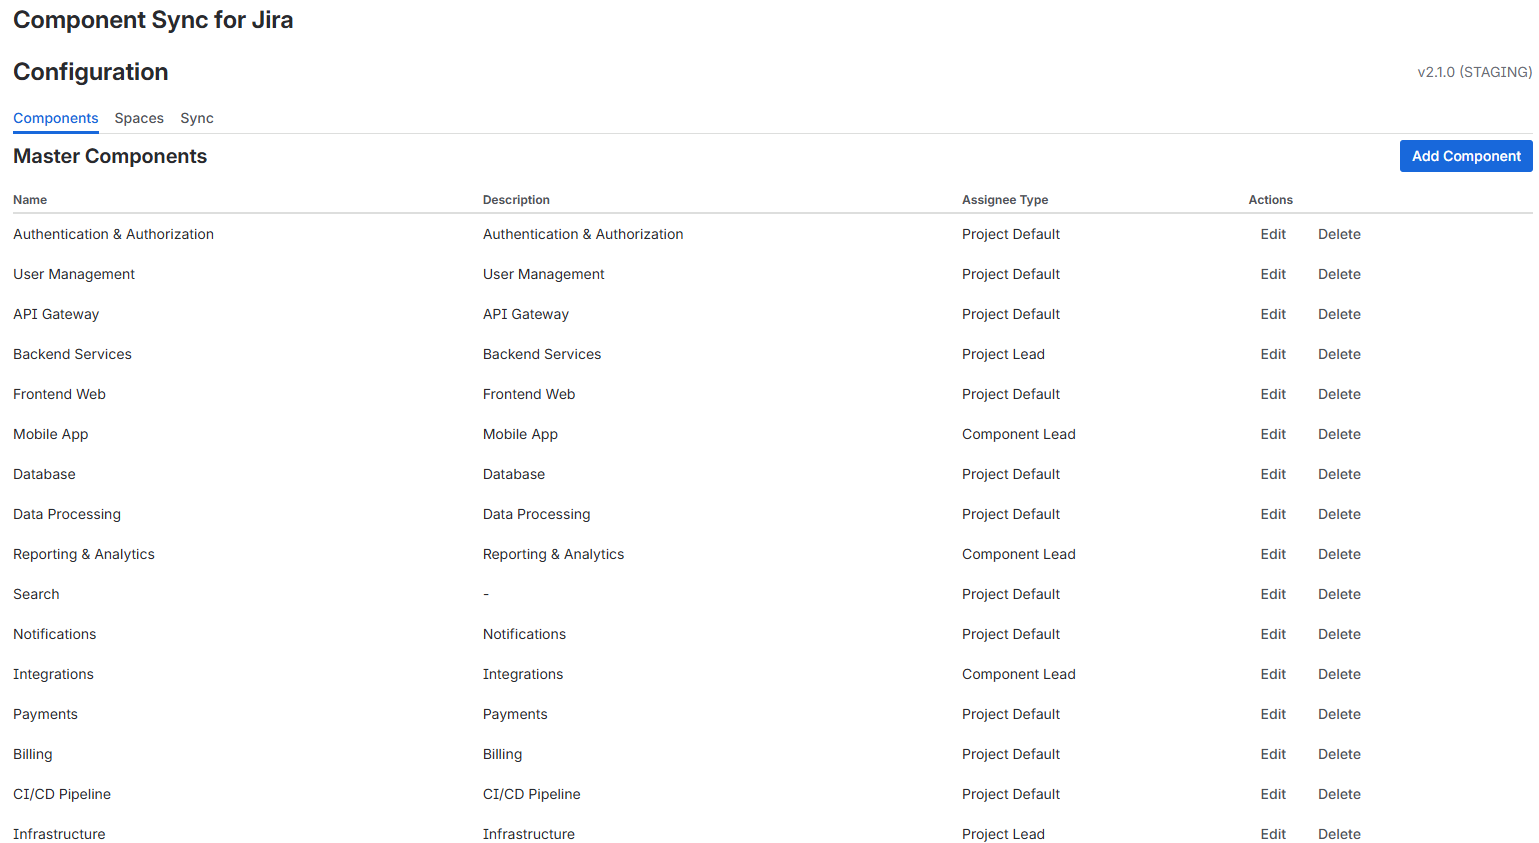
Once installed, the Component Sync for Jira admin page displays three main tabs:
- Components - Manage your master component list
- Spaces - Select which spaces receive synchronized components
- Sync - Control synchronization and view error logs
The app version is displayed in the top-right corner of the admin page.
Component Table Columns
The master components table displays:
- Name - The component name
- Description - Component description (or "-" if not provided)
- Assignee Type - The configured assignee routing type
- Actions - Edit and Delete buttons
Initial Setup Workflow
For first-time setup, follow this recommended sequence:
- Create master components in the Components tab
- Select target spaces in the Spaces tab
- Enable auto-sync or manually trigger sync in the Sync tab
- Monitor the sync results and error log
Managing Master Components
The Components tab allows you to create and maintain a master list of components that will be synchronized to selected spaces.
Adding a New Component
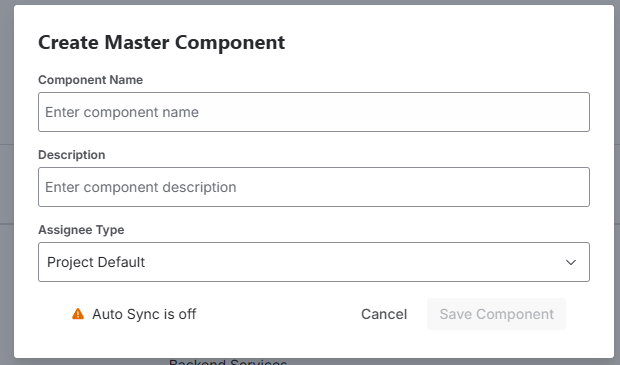
- Navigate to the Components tab
- Click the Add Component button in the top-right corner
- In the modal dialog, fill in the component details:
- Name (required) - The component name, must be unique
- Description (optional) - A brief description of the component
- Assignee Type (optional) - How issues assigned to this component should be routed:
- Space Default - Use the space's default assignee setting
- Component Lead - Assign to the component lead (if specified)
- Space Lead - Assign to the space lead
- Unassigned - Leave issues unassigned
- Click Create to save the component
Note: The Create Component modal dialog will indicate if Auto-Sync is on/off. If auto-sync is enabled (on), the new component will be automatically added to all selected spaces immediately after creation.
Editing a Component
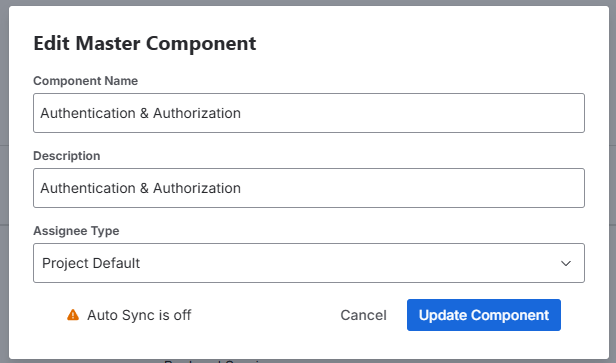
- Locate the component in the master components table
- Click the Edit button in the Actions column
- Modify the component details in the modal dialog
- Click Save to update the component
Note: The Edit Component modal dialog will indicate if Auto-Sync is on/off. If auto-sync is enabled (on), the updated component will be automatically synchronized to all selected spaces immediately after saving.
Deleting a Component
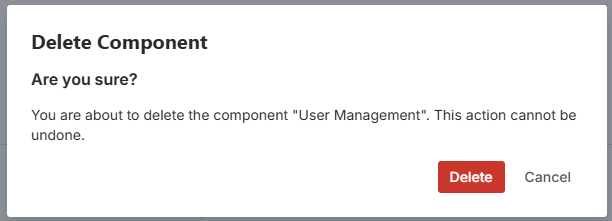
- Locate the component in the master components table
- Click the Delete button in the Actions column
- In the confirmation dialog, click Delete to confirm removal
Warning: Deleting a master component does not remove it from spaces where it has already been synchronized. You must manually delete components from individual spaces if needed.
Selecting Spaces
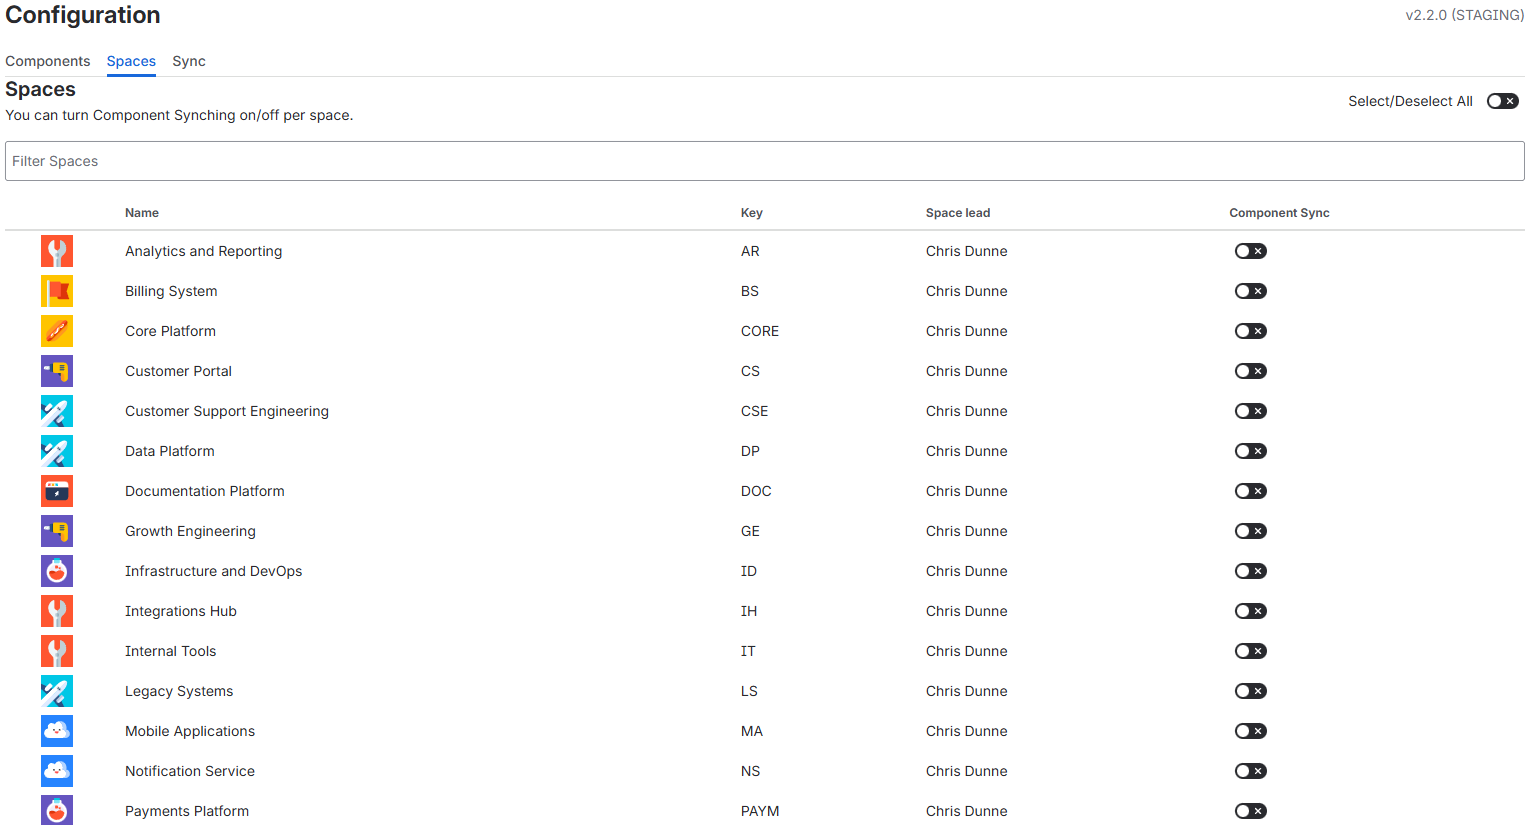 The Spaces tab displays all accessible Jira spaces and allows you to select which spaces should receive synchronized components. Note, that team-managed spaces are not displayed since they do not have components.
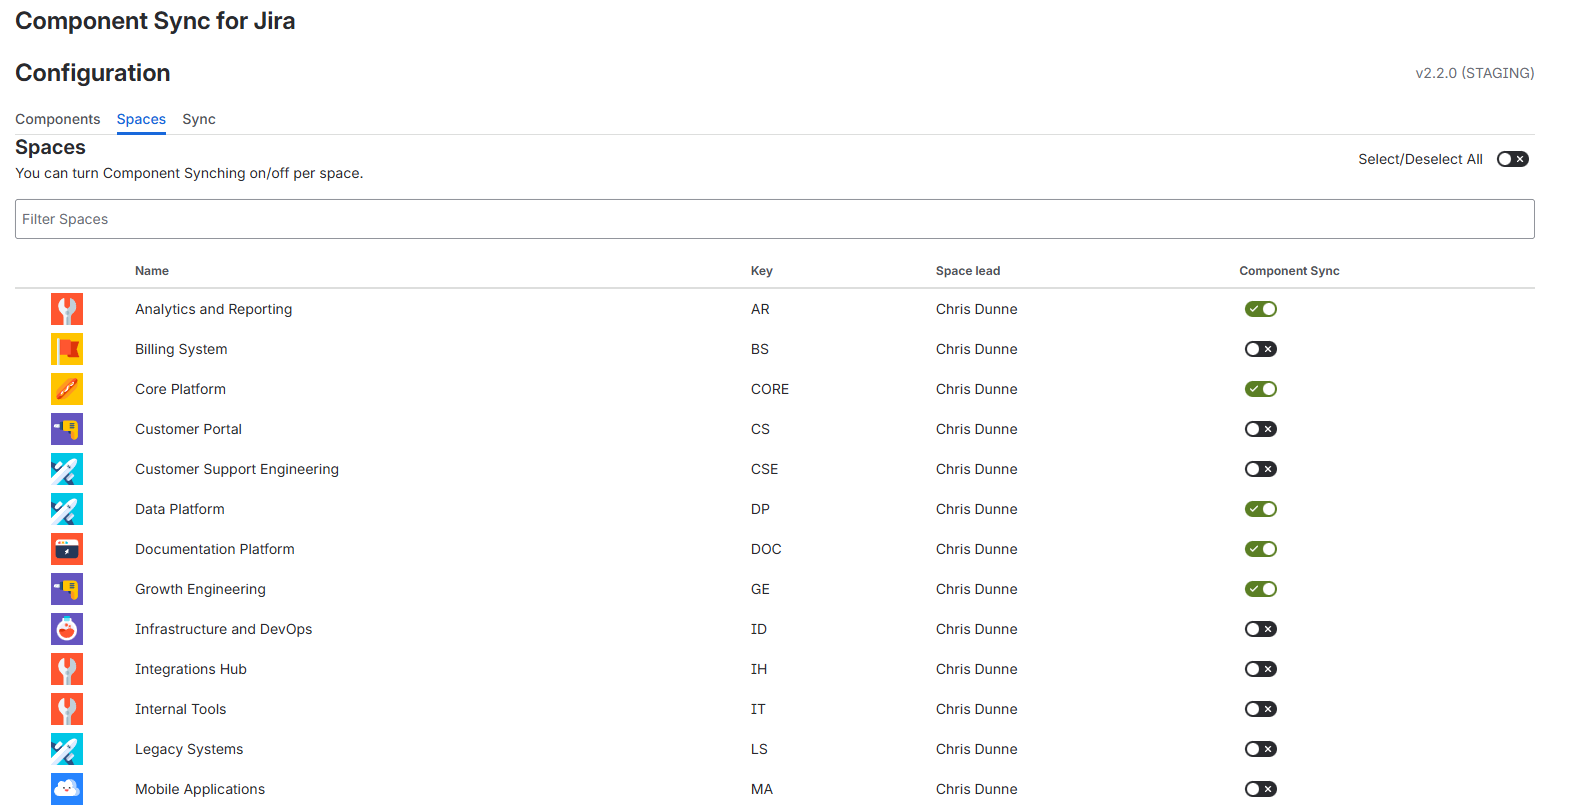
Selecting Individual Spaces
- Navigate to the Spaces tab
- Locate the space in the table
- Toggle the Component Sync switch to enable synchronization for that space
- The selection is saved automatically
 Note: Spaces with synchronization enabled will receive all master components during the next sync operation i.e. Creating a Component, or clicking the Sync Now button.
Using the Filter
To quickly find specific spaces:
- Enter text in the Filter Spaces field at the top of the table
- The table will filter to show only spaces matching your search term (by name or key)
- Clear the filter to see all spaces again
Note: Filtering only searches spaces currently displayed on the page. Use pagination to see additional spaces.
Selecting All Spaces
To enable synchronization for all spaces at once:
- Locate the Select/Deselect All toggle in the top-right corner
- Toggle it to the on position
- All spaces across all pages will be selected
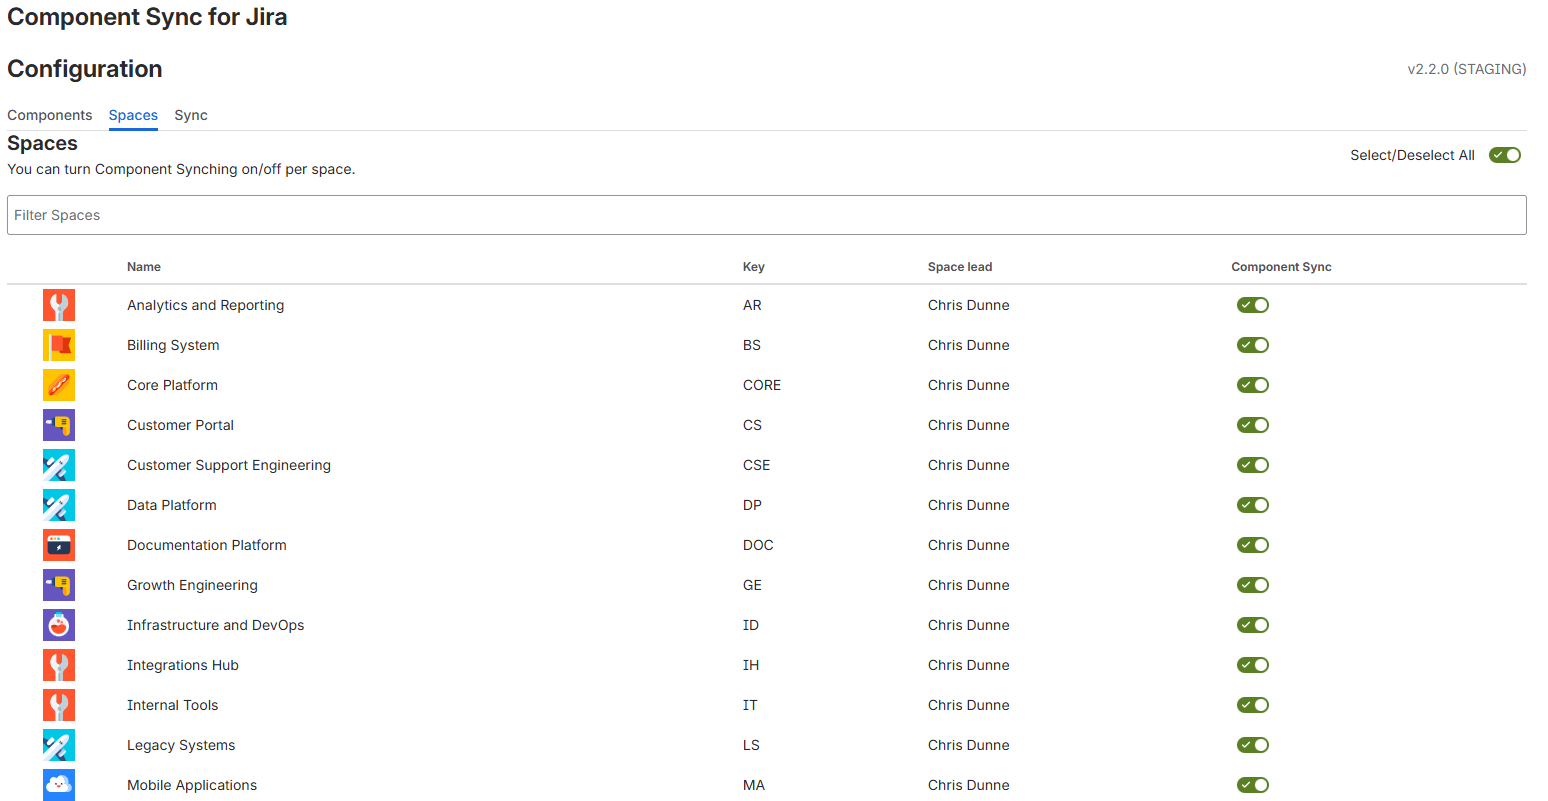
Warning: This operation affects all spaces in your Jira instance. Ensure this is your intention before proceeding.
Deselecting All Spaces
To disable synchronization for all spaces:
- Locate the Select/Deselect All toggle in the top-right corner
- Toggle it to the off position
- All spaces will be deselected
Space Table Columns
The spaces table displays:
- Avatar - Space icon
- Name - Space name
- Key - Space key
- Space lead - Name of the space lead (or "-" if not set)
- Component Sync - Toggle to enable/disable synchronization for this space
Pagination
Spaces are displayed 25 per page. Use the pagination controls at the bottom of the table to navigate between pages.
Synchronizing Components
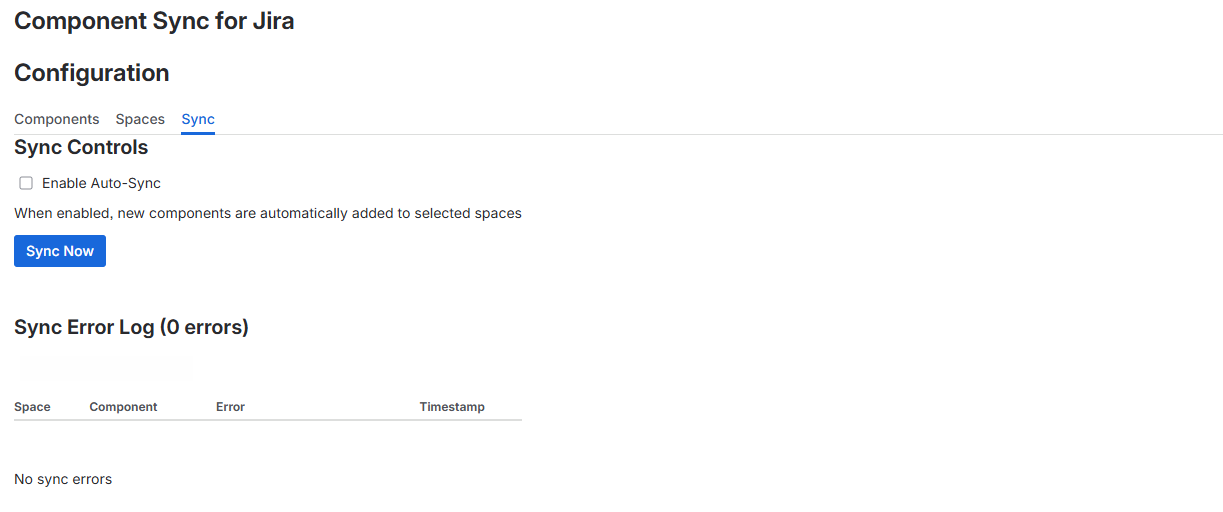
The Sync tab provides controls for synchronizing master components to selected spaces and viewing synchronization results.
Understanding Auto-Sync
Auto-sync automatically adds new master components to selected spaces when they are created.
How it works:
- When enabled, creating or updating a new master component immediately triggers synchronization to all selected spaces
- Failed synchronizations are logged in the error log
- When auto-sync is enabled, manual sync is disabled.
To enable auto-sync:
- Navigate to the Sync tab
- Check the Enable Auto-Sync checkbox
- The setting is saved automatically
To disable auto-sync:
- Navigate to the Sync tab
- Uncheck the Enable Auto-Sync checkbox
Best Practice: Enable auto-sync if you frequently add new master components and want them immediately available in all spaces. Disable it if you prefer to review components before synchronizing.
Compass vs Jira Components
This app manages Jira Components. If your project is set to use Compass, then you will not see the Jira Components in the Components view. Use the toggle in the Components view to change from Compass to Jira components. 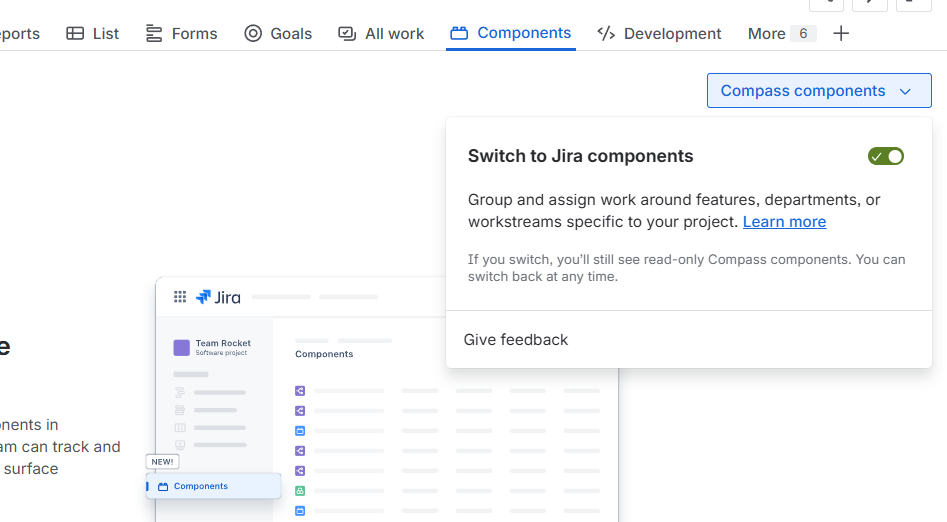
Performing Manual Sync
Manual sync updates all selected spaces with all master components.
When to use manual sync:
- After editing master component details
- After selecting additional spaces
- To retry failed synchronizations
- When auto-sync is disabled
To trigger manual sync:
- Navigate to the Sync tab
- Click the Sync Now button
- Wait for the sync operation to complete (a spinner indicates progress) and a message appears indicating synchronization is in progress. While a sync is in progress, the master component list cannot be changed.
- Review the sync summary that appears after completion
Understanding Sync Summary
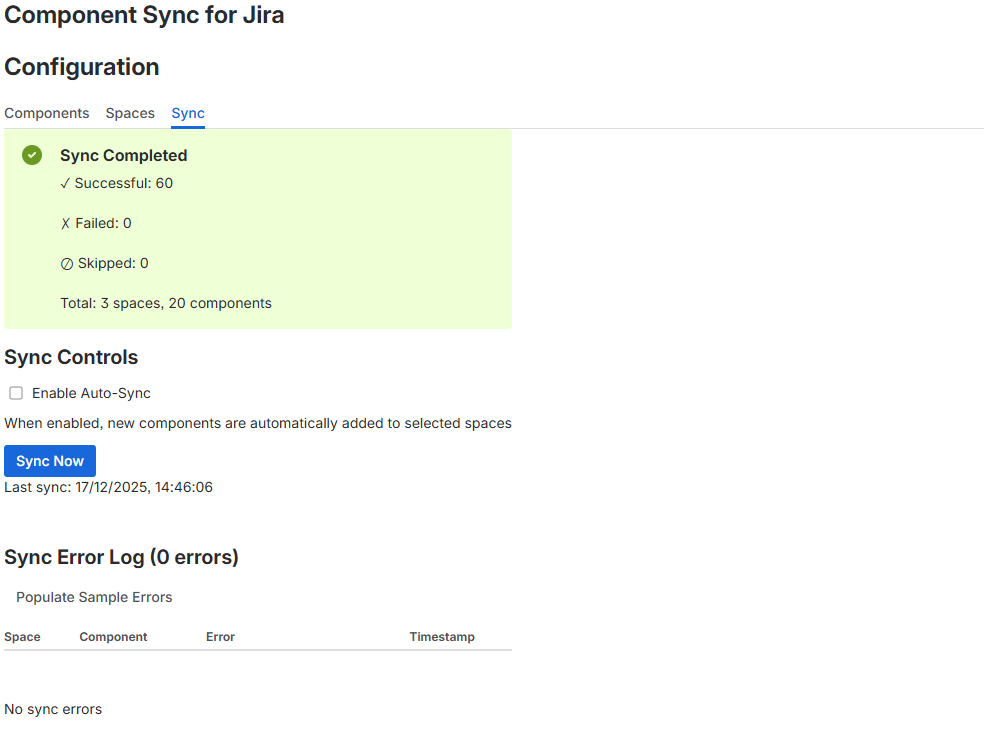
After a sync operation completes, a summary displays:
- Successful - Number of components successfully created or updated
- Failed - Number of components that failed to sync (see error log)
- Skipped - Number of components that already exist and were skipped
- Total - Total number of spaces and components processed
Note: The summary remains visible until the next sync operation.
Viewing the Last Sync Time
Below the Sync Now button, the timestamp of the last sync operation is displayed.
Example: "Last sync: 11/19/2025, 3:45:12 PM"
Viewing the Sync Error Log
The error log displays detailed information about failed synchronization attempts.
Error log table columns:
- Space - Space key and name where the error occurred
- Component - Name of the component that failed to sync
- Error - Error message describing what went wrong
- Timestamp - When the error occurred
Common errors include:
- Duplicate component names (component already exists with a different configuration)
- Network or API failures
Clearing the Error Log
To clear all errors from the log:
- Click the Clear All Errors button
- In the confirmation dialog, click Clear All Errors to confirm
- The error log will be emptied
Note: Clearing the error log does not resolve the underlying issues. You should address the errors before clearing them.
Error Log Pagination
Errors are displayed 25 per page. Use the pagination controls at the bottom of the table to navigate between pages.
Troubleshooting
Problem: Components Not Appearing in Spaces
Possible Causes:
- Space is not selected in the Spaces tab
- Auto-sync is disabled and manual sync has not been triggered
- Sync failed with an error (check the error log)
Solutions:
- Navigate to the Spaces tab and verify the space is selected
- Navigate to the Sync tab and click Sync Now to trigger manual sync
- Check the error log for any failed synchronization attempts
- Review the error message and address the underlying issue
Problem: Duplicate Component Name Error
Error Message: "A component with this name already exists in space X"
Cause: The space already has a component with the same name as the master component.
Solutions:
- Rename the master component to use a unique name
- Manually delete or rename the conflicting component in the target space
- Trigger a manual sync after resolving the conflict
Problem: Cannot Select All Spaces
Symptom: The "Select/Deselect All" toggle does not work
Cause: The toggle may be disabled if there are no spaces or if a sync is in progress.
Solutions:
- Wait for any in-progress sync operations to complete
- Verify that spaces exist in your Jira instance
- Refresh the admin page and try again
Problem: Error Log Shows Old Errors
Cause: Errors remain in the log until manually cleared.
Solution:
- Address the underlying issues causing the errors
- Navigate to the Sync tab
- Click Clear All Errors to remove resolved errors from the log
- Trigger a new sync to verify issues are resolved
Best Practices
Component Naming Conventions
- Use clear, descriptive component names that are self-explanatory
- Establish a naming convention and document it for your team
- Examples: "Backend", "Frontend", "Database", "API", "UI"
- Avoid special characters that might cause issues in Jira
Managing Master Components
- Create all master components before selecting spaces to avoid multiple sync operations
- Review component details carefully before saving to minimize the need for edits
- Use descriptions to provide context about each component's purpose
- Set appropriate assignee types based on your team's workflow
Space Selection Strategy
- Start by selecting a small number of test spaces before rolling out to all spaces
- Use the filter to find related spaces and select them in batches
- Document which spaces use synchronized components for future reference
- Consider creating a Jira space category for spaces using synchronized components
Synchronization Strategy
- Enable auto-sync if you manage components centrally and want immediate propagation
- Disable auto-sync if you prefer to review and test components before synchronizing
- Schedule regular manual syncs (e.g., weekly) if auto-sync is disabled
- Monitor the error log regularly to catch and resolve synchronization issues promptly
Error Management
- Review the error log after each sync operation
- Address errors promptly to ensure all spaces remain synchronized
- Document common errors and their resolutions for your team
- Clear the error log only after verifying issues are resolved
Testing Changes
Before rolling out component changes organization-wide:
- Create a test space
- Select only the test space in the Spaces tab
- Create or modify master components
- Trigger a manual sync
- Verify the components appear correctly in the test space
- If successful, select additional spaces and sync again
Maintenance Tasks
Perform these tasks regularly:
- Weekly: Review the error log and address any failed synchronizations
- Monthly: Audit master components to remove unused or outdated components
- Quarterly: Review space selections to ensure only active spaces are synchronized
- Annually: Review assignee type settings to ensure they align with current workflows
FAQ
Q: What happens if I delete a master component?
A: Deleting a master component removes it from the master list but does not remove it from spaces where it has already been synchronized. You must manually delete the component from individual spaces if needed.
Q: Can I sync components to a single space without affecting others?
A: No. The sync operation affects all selected spaces simultaneously. To sync to a single space, you must deselect all other spaces first, perform the sync, then re-select the other spaces.
Q: What happens if a component already exists in a space?
A: If a component with the same name already exists in a space, the sync operation will skip it and log it as "skipped" in the sync summary. The existing component will not be modified.
Q: Can I sync components from spaces back to the master list?
A: No. Component Sync for Jira operates in one direction only: from the master list to spaces. You cannot import components from spaces into the master list.
Q: Will synchronization overwrite existing components in spaces?
A: No. If a component with the same name already exists in a space, it will be skipped. The sync operation only creates new components; it does not modify or delete existing ones.
Q: Can I use Component Sync with Jira Server or Data Center?
A: No. Component Sync for Jira is a Forge app designed for Jira Cloud only. It does not support Jira Server or Data Center deployments.
Q: How many spaces can I synchronize at once?
A: There is no hard limit on the number of spaces you can synchronize. However, syncing a very large number of spaces may take several minutes to complete.
Q: What permissions do I need to use this app?
A: You must be a Jira or Site administrator to access the Component Sync admin page. The app itself requires manage:jira-space, read:jira-work, write:jira-work, and storage:app permissions.
Q: Can I customize which components sync to which spaces?
A: No. All selected spaces receive all master components. You cannot selectively sync specific components to specific spaces. If you need this functionality, consider using multiple instances of the app or manually managing components.
Q: Can I see which spaces have a specific component?
A: Not directly within the app. You would need to navigate to individual spaces in Jira to verify which components exist. The error log can help identify spaces where sync failed.
Q: What happens if a sync operation fails partway through?
A: The sync operation continues attempting to sync all components to all spaces. Failed operations are logged in the error log, and the sync summary shows which operations succeeded, failed, or were skipped.
Known Limitations
Sync Direction
Component Sync for Jira only syncs from the master list to spaces. You cannot import existing components from spaces into the master list.
One-to-All Sync Model
All selected spaces receive all master components. You cannot selectively sync specific components to specific spaces.
No Deletion Propagation
Deleting a master component does not remove it from spaces where it has already been synchronized.
Component Name Uniqueness
Component names must be unique within the master list. Jira also enforces component name uniqueness within each space.
Jira Cloud Only
The app only supports Jira Cloud. Jira Server and Data Center are not supported.
No Component Lead Management
The app does not manage component leads. You must manually set component leads in individual spaces if needed.
No Audit Log
The app does not maintain a historical audit log of sync operations beyond the current error log.
No Rollback Functionality
Once components are synchronized to spaces, you cannot roll back the operation. You must manually delete unwanted components from spaces.
Version and Support
This user manual applies to Component Sync for Jira version 2.0.0 and later.
The app version is displayed in the top-right corner of the admin page. If you encounter issues not covered in this manual, note the version number when reporting problems to your system administrator or the app developer.
For questions or support, please visit our support portal or contact Raledo through the Atlassian Marketplace.