
Configuration
Create an Issue Reference Custom Field
We start by creating the custom field in the normal way and choose the Issue Reference field type.
Login as a Jira Administrator and Select Admin ⚙ > Issues.
Under FIELDS, select Custom fields.
Click Create custom field. Make sure to select All to view the available field options.
Scroll down the list and select the Issue Reference Field Type and click Next.
Type the Name and Description of the field.
The name you select appears as the custom field's title wherever the field appears.
When you have entered the field Name and Description details, select Create.
Optionally, add the new custom field to one or multiple screens by ticking the corresponding box and click Update.
Configure the field with JQL
Once the field is created we can configure the field by setting the JQL query that should be used to populate the select list.
Login as a Jira Administrator and Select Admin ⚙ > Apps.
Under APPS in the left hand navigation sidebar, select Simple Issue Links.
If this is the first time you have used this field type then you will be accessed to grant access to the app before you can configure the field. Follow the on screen instructions and grant acces for the application. For more information see Grant Access to App.

Click the Config button next to the name of the field you are configuring.
Now you will create a Context for your configuration. A context is similar to a custom field context. The context allows us to present the user with different options for a field i.e. different JQL can be executed for each context. For each context we specify the Project(s) and Issue Type(s) that should be matched for each context. In the example below if the user is viewing an issue in the ABC project, the field called Dev Ref Field will execute the JQL “project = CCM”, thereby showing a list of all issues in the CCM project.
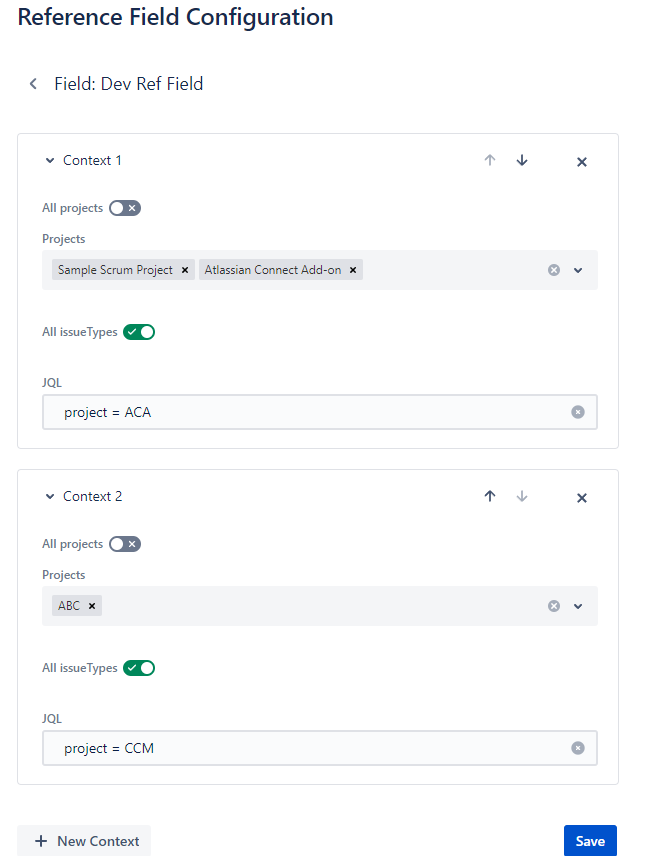
In the JQL field, type the JQL query you will use to populate the options in your Issue Reference Field. Click the Save button.
Using with Automation Rules
Changes to the field value can be used to trigger automation rules, just like any other field. For example if you want to automatically create or delete a Jira Issue Link when the value in your Issue Reference field changes, you can do the following.
Tips
Try to ensure the JQL will only return relevant issues. For example, if it does not make sense to create a relationship with an issue that is closed, then exclude closed/resolved issues from the JQL results (e.g. ‘AND resolution is empty’)
Migration Custom Field Context Configuration to New Configuration Experience
In previous versions of the app we used the custom field context to configure the JQL that is associated with the instance of the custom field. However, we have now changed this so that the app has its own configuration screen.
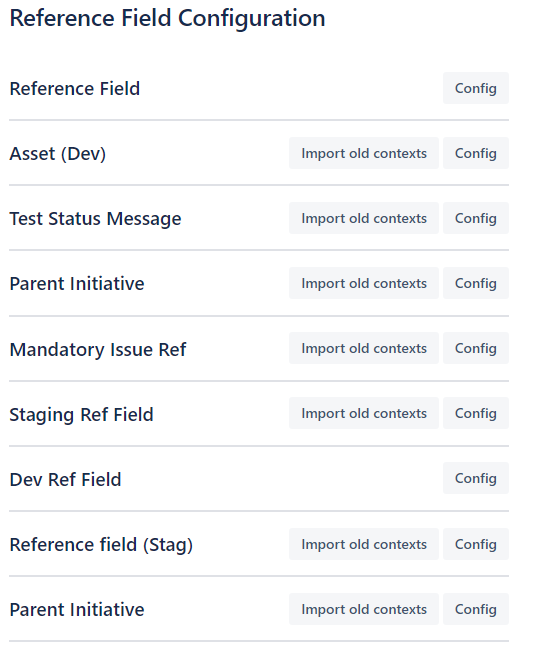
This will list all the custom fields of type Issue Reference Field Type, and allow you to configure each independently, without using the custom field context.
It will also provide a mechanism to import the configuration from the custom field context should you have any existing fields created with an older version. If you click this button next to the field name, the JQL for your custom field will be imported. Once imported, the option to import will disappear for the relevant field.
When you click on Config, you will be presented with the configuration screen. Here you can add a new Context and Configure existing contexts.